Explosive Gaming Controllers Mug Wrap: A Practical Guide to Sublimation Workflows and Design Integration
Creating custom sublimation mugs that stand out requires more than just a good printer and heat press. The design itself must be precise, the wrap must align correctly, and the entire workflow—from file prep to final pressing—needs to be consistent. The Explosive Gaming Controllers Mug Wrap offers a targeted design asset for anyone producing gaming-themed drinkware, but understanding how to integrate it into a broader sublimation process is what turns a good idea into a repeatable product. This article walks through the practical aspects of using this wrap, from planning and preparation to pressing and quality control, so you can incorporate it smoothly into your own workflow.
What the Explosive Gaming Controllers Mug Wrap Is and Where It Fits
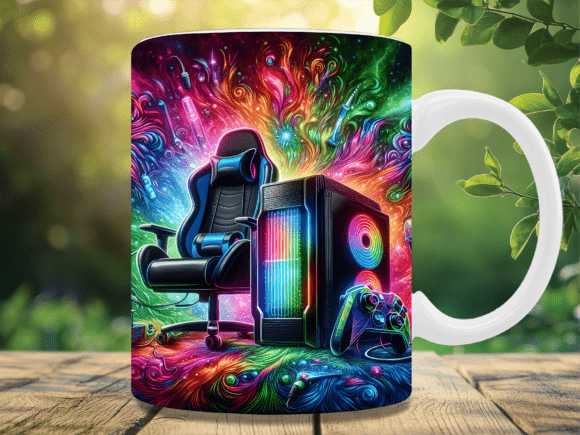
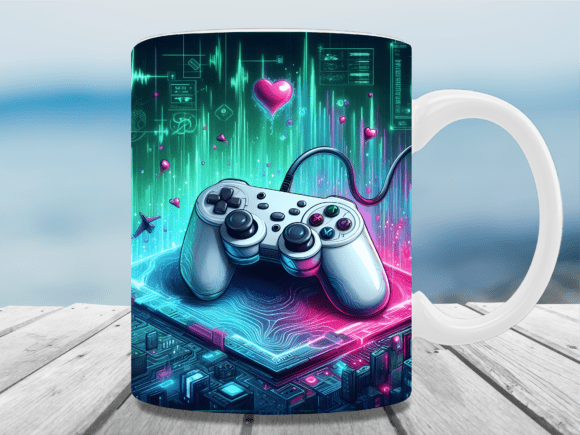
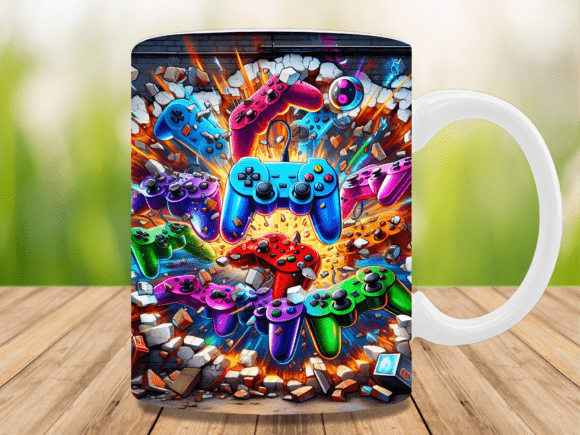
The Explosive Gaming Controllers Mug Wrap is a digital design file—a sublimation-ready PNG at 300 DPI—that wraps around a standard mug surface. It comes in three sizes to match common mug formats: 8.5 x 3.75 inches for 11 oz mugs, 9 x 4 inches for 12 oz mugs, and 9.5 x 4.75 inches for 15 oz mugs. The design features gaming controllers in an energetic, explosive composition, making it suitable for audiences who appreciate gaming culture, esports, or pop-art aesthetics.
In a sublimation workflow, this wrap serves as the creative core of the project. You do not need to design from scratch or worry about alignment calculations. Instead, you receive a finished graphic that only needs to be printed, taped, and pressed. This saves time during the creative phase and allows you to focus on execution and consistency. For small business owners, hobbyists, or creators who produce multiple mugs in a batch, having a pre-designed wrap like this reduces variability between units and helps maintain a cohesive product line.
Planning Your Sublimation Project Around the Mug Wrap
Before you open your design software or fire up the heat press, take a moment to map out the entire workflow. The Explosive Gaming Controllers Mug Wrap fits into the preparation stage as a fixed asset. Because the file is already sized to specific mug dimensions, you do not need to calculate shrink rates or adjust canvas sizes. However, you still need to confirm a few variables.
First, verify the mug you intend to use. Measure the circumference and height of your blank mugs and compare them to the provided template dimensions. Even though the wrap is labeled for 11 oz, 12 oz, and 15 oz mugs, actual mug dimensions can vary slightly between manufacturers. A quick measurement ensures your print will wrap correctly without gaps or overlap. Second, check your printer settings. The PNG file is 300 DPI, which is standard for sublimation printing. Confirm that your RIP software or printer driver is set to print at full resolution and that color profiles match your sublimation ink and paper combination.
Third, plan for how you will handle multiple mugs. If you are producing a batch of ten or more, print several wraps at once on a single sheet of sublimation paper. The wrap sizes are compact enough that you can often fit two or three on one page, depending on your paper dimensions. This saves material and reduces printing time. Label each print with the corresponding mug size to avoid confusion during the pressing phase.
Printing the Wrap: Practical Steps for Consistent Results
When you are ready to print, open the PNG file in your sublimation design software. Do not resize or scale the image beyond minor adjustments for printer margins. Because the wrap is already sized for specific mugs, scaling it up or down will distort the design and may cause alignment issues during pressing. If your printer has a borderless option, use it to maximize the printable area. Otherwise, ensure that your printer margins do not cut off any part of the design.
Use high-quality sublimation paper designed for your printer type. The paper should be stored in a dry, cool environment to prevent moisture from affecting ink absorption. Print one test copy on plain paper first, hold it up to your mug, and verify that the height and width match the mug surface. This step takes less than a minute and can save you from wasting sublimation paper and ink. Once you are satisfied, print on sublimation paper and allow the ink to dry completely before handling.
After printing, trim the wrap carefully. Use a sharp craft knife or paper trimmer to cut along the edges. Because the wrap is a PNG with a transparent background, you may need to trim close to the design area to avoid excess paper that could cause wrinkling or ghosting during pressing. If the design includes white areas that you want to preserve, keep those intact—sublimation does not print white, so those areas will remain the mug color.
Taping and Positioning: Getting the Wrap Onto the Mug
Positioning the wrap correctly on the mug is one of the most critical steps in the entire workflow. Even a slight misalignment can result in a design that is off-center or has gaps. Start by cleaning the mug surface with isopropyl alcohol to remove any oils or dust. This ensures the tape adheres well and the sublimation transfer is even.
Place the printed wrap around the mug with the printed side facing inward toward the mug surface. Align the top edge of the wrap with the rim of the mug, but leave a small gap—about 1/16 inch—to account for the mug's taper and the wrap's natural movement during pressing. Use heat-resistant tape to secure the wrap in place. Apply tape vertically along the seams and horizontally across the top and bottom edges. Do not stretch the paper; it should sit flush against the mug without wrinkles.
If you are using a mug wrap that includes a seam where the two ends meet, ensure the seam is aligned perfectly. A slight overlap is acceptable, but avoid gaps. For the Explosive Gaming Controllers Mug Wrap, the design is continuous, so the seam should fall in a natural break area of the artwork if possible. Once taped, double-check that the wrap is snug and that no edges are lifting.
Pressing: Time, Temperature, and Pressure
The pressing phase is where the design becomes permanent, and consistency here directly affects product quality. Preheat your mug press to the recommended temperature for your sublimation ink and mug coating. A typical range is 380–400°F (193–204°C). While the press is heating, place your taped mug onto the press and close it gently to check the fit. The press should hold the mug firmly but not crush it.
Pressing time usually falls between 60 and 90 seconds, depending on the mug thickness and coating. For 11 oz and 12 oz mugs, 60 seconds at 400°F is often sufficient. For 15 oz mugs, you may need 75 to 90 seconds because the larger surface area absorbs more heat. Keep a timer handy and avoid opening the press prematurely, as this can cause uneven transfer.
Pressure is another variable. If the press is too loose, the paper will not make full contact with the mug, resulting in faded or ghosted images. If it is too tight, the mug may crack or the paper may shift. Adjust the press so that it holds the mug securely but still allows you to rotate it slightly. Some mug presses have adjustable stops; use them to set a consistent depth for every mug.
After the press cycle completes, remove the mug immediately and allow it to cool on a heat-resistant surface. Do not peel the paper while the mug is hot, as the dye may still be mobile and could smear. Once the mug reaches room temperature, gently remove the tape and paper. The design should be vibrant, sharp, and fully adhered to the mug surface.
Quality Control and Batch Consistency
After pressing each mug, inspect it under good lighting. Look for areas where the design is faint, has white spots, or shows ghosting. These issues often point to insufficient pressure, uneven heat, or paper movement during pressing. Keep a log of your settings and results. Over time, you will learn the exact time, temperature, and pressure that work best for your specific mug blanks and sublimation materials.
For batch production, consistency is more important than perfection on a single mug. Use the same settings for every mug in the batch. If you notice a pattern of issues—for example, the top edge of the design is always faint—adjust the wrap position slightly higher or lower and test again. Small adjustments compound over large runs, so track changes systematically.
The Explosive Gaming Controllers Mug Wrap, because it is a pre-sized digital file, helps enforce consistency across batches. Every mug using the same size wrap will have the same design proportions. This makes it easier to reproduce results and reduces the number of variables you need to manage. If you produce mugs for clients or events, this reliability is valuable.
Integrating the Wrap Into a Broader Product Workflow
Beyond the pressing process, the mug wrap can fit into a larger product ecosystem. For example, if you sell gaming-themed merchandise, you can pair these mugs with matching coasters, mouse pads, or phone cases that use similar design elements. Because the wrap is a digital file, you can also use it as a mockup for listing photos or social media content before you even press the first mug.
If you are a content creator or educator, you can use the Explosive Gaming Controllers Mug Wrap as a teaching tool. Demonstrate the entire sublimation workflow—from file preparation to pressing—using this single design. Students or viewers can follow along because the wrap dimensions are known and the design is straightforward. This makes the learning process less abstract and more actionable.
For small business owners, the wrap can be part of a limited-edition drop or a seasonal product line. Because it is a digital download, you can print as many copies as you need without inventory risk. You can also offer customization—for example, adding a name or logo to the blank area of the design—before printing. This adds a personalization layer without requiring a full redesign from scratch.
Long-Term Use and File Management
Since the Explosive Gaming Controllers Mug Wrap is a digital download, managing the file properly ensures you can use it repeatedly without degradation. Store the PNG file in a dedicated folder on your computer or cloud storage, along with any notes about the printer settings, mug brands, and press parameters that produced the best results. Over time, this folder becomes a reference library for your sublimation workflow.
Because the wrap comes in three sizes, keep all variants organized by mug size. Label them clearly so you can grab the correct file without hunting through folders. If you use the design regularly, consider creating a pre-saved print preset in your RIP software that includes the correct dimensions and color settings. This reduces setup time for future batches.
Finally, remember that the physical mug itself is not included. The wrap is purely a digital asset that you combine with your own materials and equipment. Understanding this distinction is important for both planning and pricing. The value of the wrap lies in the time it saves you during the design phase and the consistency it provides across multiple prints. When you factor that into your production cost, the digital download becomes a small but efficient part of your overall workflow.
Whether you are producing a single gift mug or a batch of fifty for an event, the Explosive Gaming Controllers Mug Wrap is a practical tool that fits cleanly into a well-organized sublimation process. By focusing on preparation, precise printing, careful positioning, and consistent pressing, you can turn this digital asset into a finished product that meets your standards every time.